Working With The Database
In the last lesson, I showed you how to set up URL routes to different views. In this lesson, I'll show you how to write code that interfaces with the database.
Accessing the Admin Page
If you remember when we were defining routes, we saw that there was an "admin" route already defined. This
route is Django's built-in admin page. It lets us interact with the database, and administrate the site.
Let's navigate to this page right now. Start the server, and then navigate to the admin/ route
in your browser. You should see something like this:
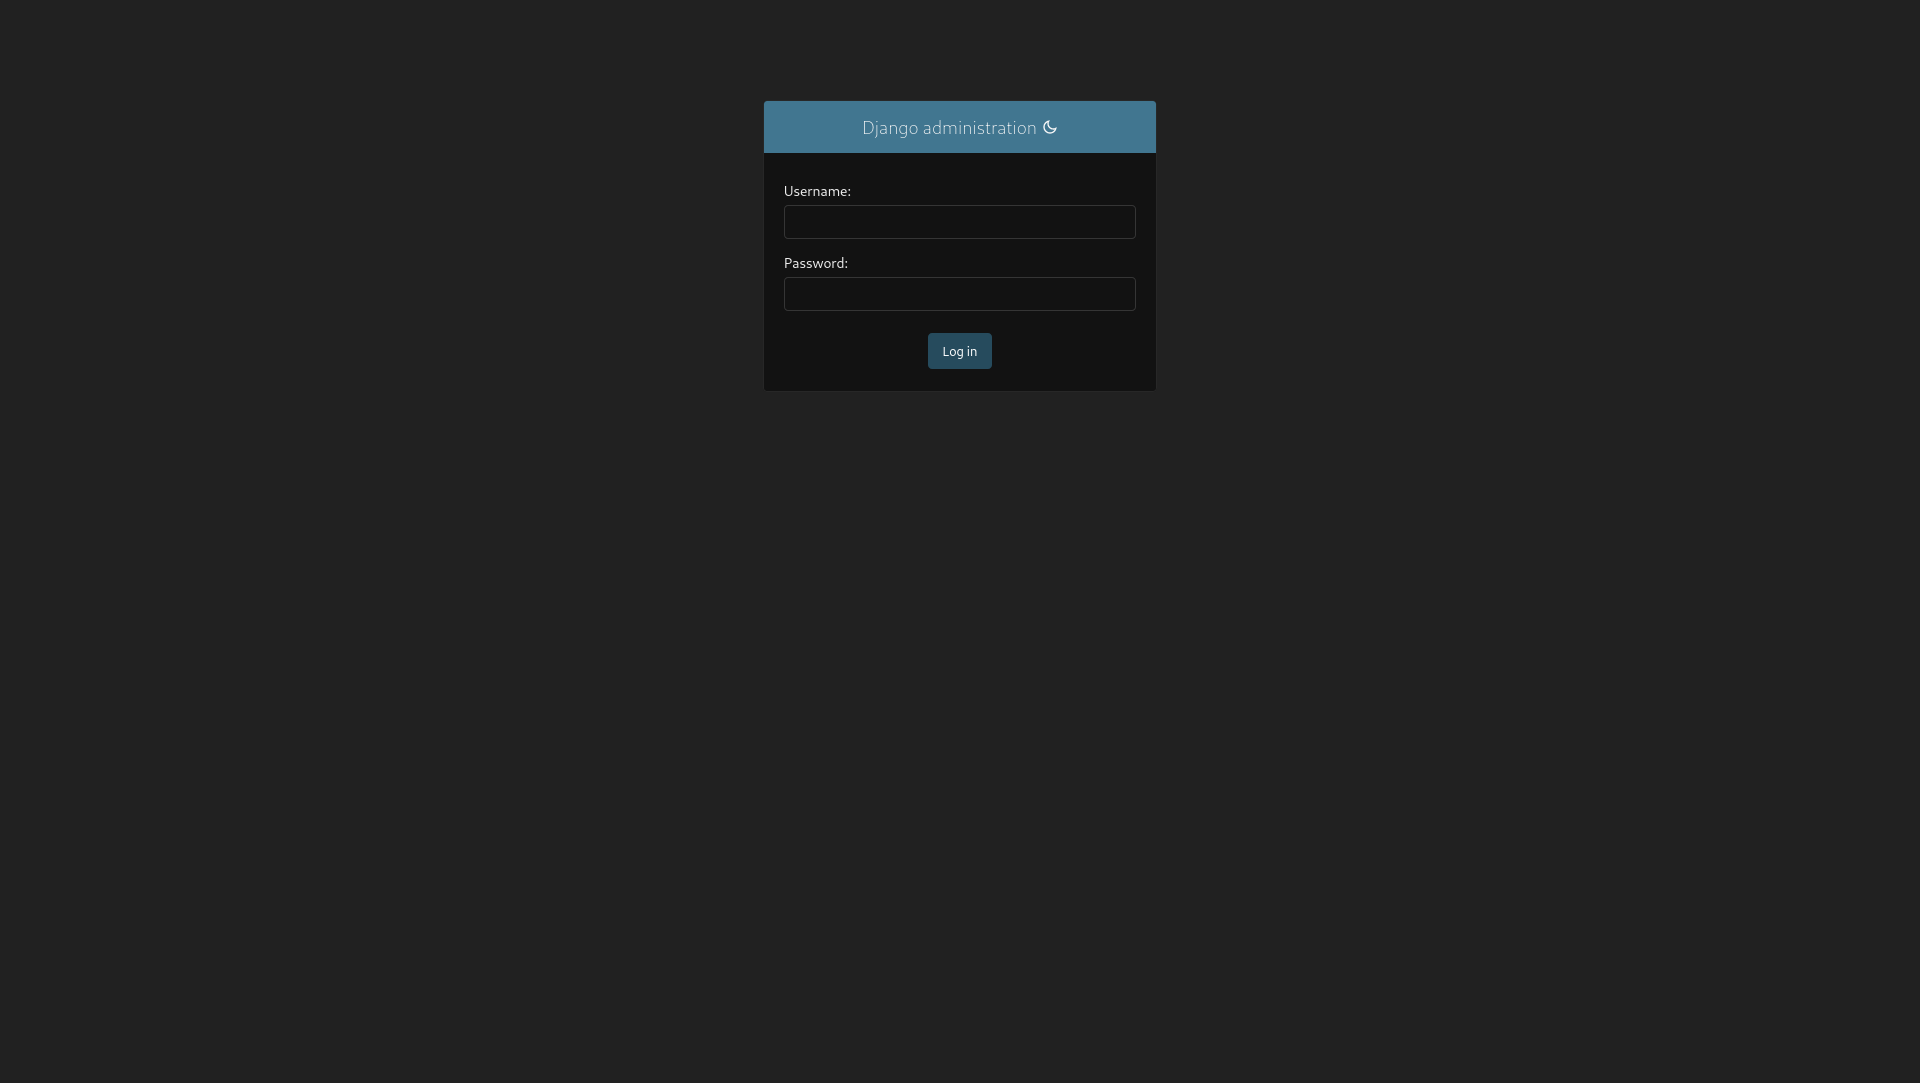
As you can see, it requires an admin user's credentials to log in. Since we don't have a user creation screen right now, we can't really make one. Fortunately Django has us covered. To get started with creating an admin user, run the following command in your terminal:
python3 manage.py createsuperuser
If you've been following the tutorial up to this point, it won't work. You'll see an error. Quite a long one too. But we can get the gist of the error by reading the final line:
django.db.utils.OperationalError: no such table: auth_user
What does this error mean? It boils down to the way SQL (our database program) stores information. In SQL, data is stored in a table, kind of like a spreadsheet. For a database that holds countries, that would look like so:
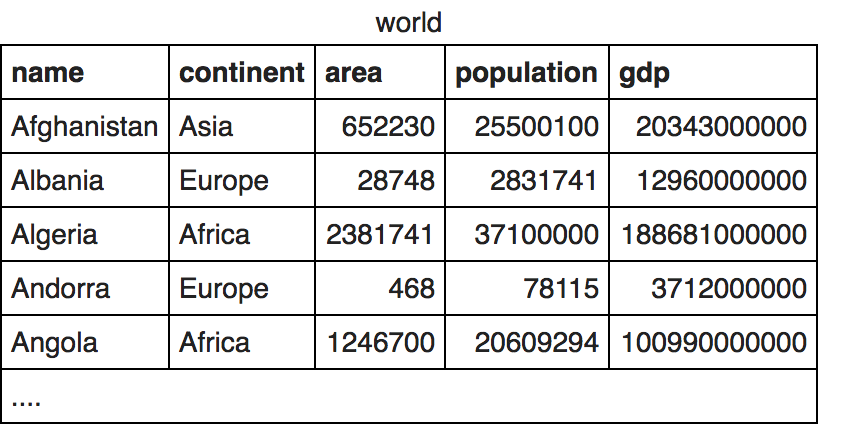
The table is the group of all the data entries. In this case, the table is called "world". The database has several columns, like name, continent, and area. And then below these columns, we have all the entries. What the error is saying, is that the table that contains "auth_user" (aka, the admin user), doesn't exist in our database right now. So how do we go about making it? This is where database migrations come into play.
Database migrations are a way to prepare and make changes to our database. The very first migration you run in a Django project automatically sets up the "auth_user" table, so no code is required (this changes when we start using the database more). To prepare for a migration, run the following command:
python3 manage.py makemigrations
This will generate the database code to be run during the migration, although in this case, we haven't done anything, hence why no changes are detected. The database code is generated in the migrations directory of your apps, and experienced Django developers may tweak the code to their liking. To run the migrations, use this command:
python3 manage.py migrate
As you can see, the database was modified, and the "auth_user" table should now be ready. We can now try re- running the command from earlier:
python3 manage.py createsuperuser
This will prompt you for details of your user. Fill this out to completion.
Note: You may not see anything when typing a password. This is by design so that you may create a password while being watched.
With our new user, we can log in to the admin page. Go ahead and restart the server if you haven't already
and navigate to the admin/ site.
Once you've logged in, you should be able to see a "Users" and "Groups" menu. If you click on "Groups", you'll see there are none. If you click on "Users", then you'll see we have the user we just created. You can also click on this user to see more detail about the user.
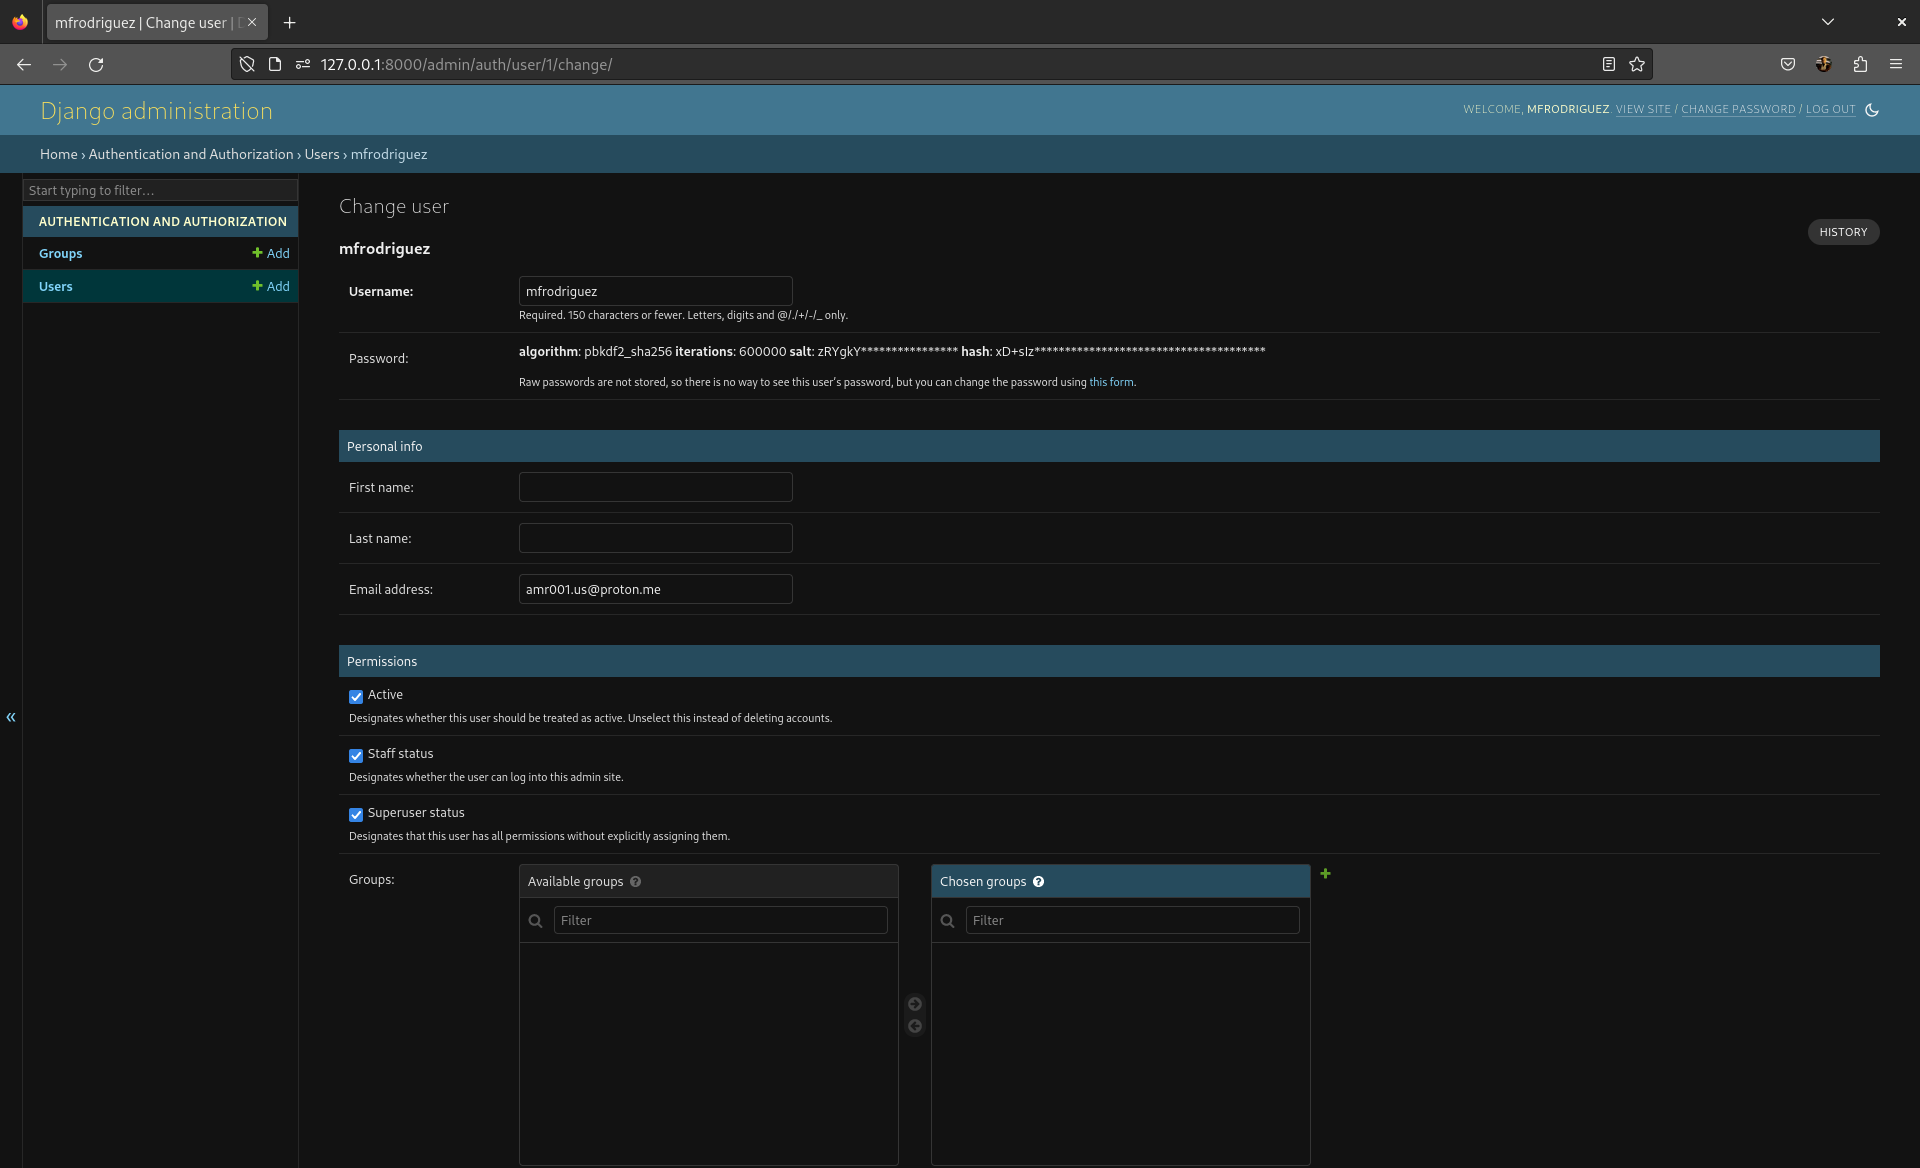
As you can see, Django stores our username, a password hash, and some personal info. It is all editable by us. Any changes we make here will be applied to our database.
A password hash is a way of storing a password by storing it's encrypted version. When the user creates an account, the password is hashed (encrypted), and then stored. When the user goes to log in again, the password they enter is also hashed, and the 2 are compared. If the hashes match, then the user has entered the same password, so they can log in.It's pretty common for sites like these to create test users, so lets go ahead and do that. Go back to the user page, and then click on "Add User". Then, fill out all the details for your test user. I'm calling my test user "MrTest" and using a password of "testing12". Once done, save and continue editing, so we can continue adding fields, like an email address. We can also scroll down to see all the permissions this user has. This test user is an active user, but doesn't have staff status (they can't use the admin page) or superuser status (they have all permissions).
Once done, we can go back to the home page, where our actions have been logged on the right.
Creating our own Database Models
Django makes use of an object relational mapper for it's database, and I think it's a good idea to explain what that is before we write any code. If you recall, under the hood, and SQL database is just a bunch of tables. An ORM helps turn your code into different tables. That's the object and mapper part - it takes your code for objects and maps it to database tables. The relational part works like this:
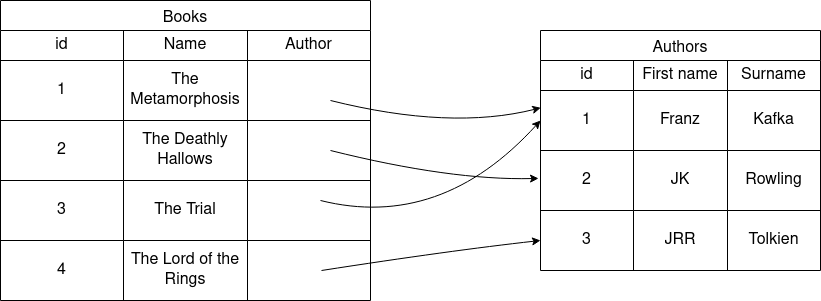
As you can see, we have a table of books, and a table of authors. The books have IDs, titles, and authors. That last one points to an entry in the authors table. What this means in practice is that each book has one author, but one author may have many books. These relationships are an example of the relational part of the ORM. Your code can relate different pieces of data together.
Another way to explain an ORM is that your code serves as a blueprint for different database tables. Each field that you give the model is then used in the database.
Now that you know what an ORM is, let's get to using it. Open up the blog's models.py. You should see something
like this:
blog/models.py
from django.db import models

# Create your models here.
This models.py file is where we'll model the objects for our ORM - the actual things that go in the database.
Before we jump into that though, lets stop and think about what we need.
We are doing a blog app, so we'll definitely need a blog post. Each blog post should have:
- a title
- some content
- the time when it was last modified
- And an author
Our title and content will simply be some text. Our author will be a user who is registered. As we know, users already exist in our database, since we went through all the trouble of creating them. Let's now reflect these pieces of information.
blog/models.py
from django.db import models


class Post(models.Model):
    title = models.CharField(
        max_length=100, help_text="Enter the post's title")
    content = models.TextField(help_text="Enter the post's content")
    last_modified = models.DateTimeField(auto_now=True)
    author = models.ForeignKey(User, on_delete=models.CASCADE)
Let me break everything down for you. First, we create a class called Post that inherits from
models.Models. This is the "object". Next, we give it some fields, which will become database columns once we
run migrations. First we create a title field, which is a Django character field, with the max length option set to 100
characters, and some help text that will be displayed when we creating a post from the post creation page. Next, we make
content field, and use a Django text field, which just has some help text. We create a "last_modified" field using Django's
datetime field, with the "auto_now" option set to true. This option will automatically change the value for a post's last
modified field to whenever it is modified last. Lastly, we have an author field, which is a foreign key relationship.
"Foreign" means another table, and key just means an entry. In this case, we've specified for a post's author to be an entry
in the users table. The "on_delete" option just specifies what to do when a user is deleted. In this case, we've chosen to
also delete the posts, creating a "cascade" of deletion.
Now that we are done creating the models, we must now apply the database migrations associated with them. Run the following in the terminal:
python3 manage.py makemigrations
As I mentioned above, this code prepares, but doesn't run the database code to create/modify tables. Here, it will create our post model. To actually run these migrations, run the migrate command:
python3 manage.py migrate
To see the actual SQL run on the database, you can run the following:
python3 manage.py sqlmigrate blog 0001
Here, "blog" is the name of our app, and 0001 is the number of the specific migration, which we can see when we run the "makemigrations" command. This command spits out a whole bunch of SQL, but we can see that everything we asked for was done. It creates a table called "blog_post", automatically sets up unique IDs for these posts, as well as a title and content field. It also point to an author ID from the "auth_user" table, which as we saw earlier, contains all our apps users. And like that, our database code for blog posts is complete.
Database Querying
Now, let's take a look at how to access these database models. Since right now, we don't have any way to create or view them besides the admin page, we're going to use the Django interactive shell (which is just a Python shell), which will allow us to access these database models in a programmatic fashion. To get started, run the following in your terminal:
python3 manage.py shell
Now that that is working, let's import both the post and user models. Run the following lines:
from blog.models import Post
from django.contrib.auth.models import User
If you recall, we've just created 2 users, so let's take a look at them. To do this, run the following:
User.objects.all()
All of this code can also be run for the Post model, except since we have no posts, everything will be empty.
This returns a queryset of all the users. We can get the first item using the User.objects.first() method
or instead use the last method to do the opposite. To filter, we run this code:
User.objects.filter(username='MrTest')
This code will return all the users whose username is MrTest. We can do this for any field, mind you, like first name or
last name, ID, etc. To get the first user that matches this query, we could do
User.objects.filter(username='MrTest').first().
If we want to get a user by ID, we can use the getmethod, which will get a user based on whatever info we give it.
To get a user with an ID of 1, that would look like this.
User.objects.get(id=1)
We can also do this like so:User.objects.get(pk=1)"pk" stands for primary key, and is just another name for the unique column for each database entry. In this case, ID and PK mean the same thing, since our ID is the unique number, hence, it is the primary key
Now, let's create a new post. First, let's assign our test variable to our test user by getting it based on ID:
user = User.objects.get(id=1)
Now let's create a post. Run this to create a post object:
post1 = Post(title='first post', content='hello there! this is the first post', author = user)
This code just fills out all the fields, minus the datetime field and the ID field, which are both automatically generated. Now that we've created the post, we can save it to the database, by running the following:
post1.save()
To verify, we can check the post object list, just like we did with our user:
Post.objects.all()
As you can see, the post we just created shows up! However, it's not very descriptive in the query. To change how this appear, we
can define the __str__() method on our object. All this does is change how the object is printed out. Make sure your
models.py to look like the following:
Note: The __str__ method is special, as it defines how an object looks like when printed out.
blog/models.py
from django.db import models
from django.contrib.auth.models import User


class Post(models.Model):
    author = models.ForeignKey(User, on_delete=models.CASCADE)
    title = models.CharField(
        max_length=100, help_text="Enter the post's title")
    content = models.TextField(help_text="Enter the post's content")
    last_modified = models.DateTimeField(auto_now=True)

    def __str__(self):
        return self.title
Once you've done that, use exit()to leave the shell, then restart it, and import the Users and
Postsagain like we did above. Now if we run Posts.objects.all(), we can see that now the post is shown
as we've asked it to be.
Another trick we could do, is create a post using a user ID instead of a concrete user. While this isn't a good idea in practice, it's a good demonstration of how the SQL we saw above matters. Run the following:
post2 = Post(title = 'second', content='number 2!', author_id=1)
post2.save()
The reason this works is that in the SQL we saw above, the author column is called "author_id" and holds the ID of the user that
creates the post. In this case, a user of ID 1 corresponds to the very first user we made. We can verify this by running
Post.objects.all(), which will show our new second post. To inspect the details of our new post, let's assign it a
variable.
post = Post.objects.first()
Now, we can check out the details. To access the title, we can do post.title, for the time last modified, we can do
post.last_modified, and to access the author, we can use
post.author. That last one is actually pretty useful, because it actually access the entire user object, meaning we
can access all of it's attributes. For example, to get the post's author's email, we can do post.author.email
Another thing we can do is to take a look at all of a user's posts. While we could filter posts by user, Django also has a special way to do it. First, let's assign a user to a variable
user = User.objects.get(id=1)
This gets the user with ID 1 in a variable. To see all of their posts, run the following:
user.post_set.all()
post_set is an attribute Django has created for us, and it contains all of the posts. To view it, we use the all()
method. We can add to this set by running the following:
user.post_set.create(title ='third', content='number 3')
This will create a post with the author automatically set to the user.
Using our new Posts instead of our Dummy Data in our Templates
Now that we've learned how to query the database, we can now use these queries to provide real data to our templates, instead of just using
dummy data. Open up blog/views.py.
Here we can see that our blogview uses the dummy data we pass into the context. You can go ahead and delete this, since we
won't be using it anymore. Instead, we'll do a database query for all of the post models.
First, let's import our Post model so that we can access it. Write the following at the top of the file.
blog/views.py
from .models import Post

# --snip--
We use .models because our models are in the same folder
Next, let's edit the blog view so that it runs a database query to get the context:
blog/views.py
# --snip--

def blog(request):
    context = {
        'posts': Post.objects.all(),
        'title': 'Blog'
    }
    return render(request, 'blog/blog.html', context)
Lastly, make sure your template uses all the correct keys, like so (copy this if need be):
{% extends "blog/base.html" %}
{% block content %}
  <h1>Byte Club Blog</h1>
  {% for post in posts %}
    <h2>{{ post.title }}</h2>
    <p>by {{ post.author }}. Last modified on {{ post.last_modified }}</p>
    <p>{{ post.content }}</p>
  {% endfor %}
{% endblock content %}
Note: If you want to change the format of last modified field, the full list of options is here
Now, if you restart the server, then navigate to the blog page, you should be able to see all of the post's we created show up.
Adding our Post model to the Admin Site
Right now, if you navigate to the admin panel, you'll see that our Post model is not present. To get it to show up, we must
register it with our admin page. To do this, open the admin.pyfile in our blog app. It should look like this:
blog/admin.py
from django.contrib import admin

# Register your models here.
To register our Post model, we must import it and then use the register method. Make sure the file now looks like this:
from django.contrib import admin
from .models import Post

admin.site.register(Post)
Now, if you restart the server, then navigate to the admin site, you'll see that our Post model is now there, and has all of our posts. You can also create more if you want, as well as update existing ones.
Recap
Alright, that wraps things up for this lesson. We learned about the admin page, creating database models, database migrations, querying the database, as well as using these queries to provide data from the database to the template.